Brick It: How We DIY'ed A Long-Lasting Facade
In 2022, we started adding on to our home which included a new attached garage and kitchen addition. We've got plans to redo the siding on the rest of the house in the near future, but the kitchen portion felt like a good place to utilize a different material. My wife and I both really liked the idea of brick, but masonry exteriors are 2-3x more expensive than Hardie siding.
I have some experience with masonry but certainly not enough to tackle a traditional brick facade. Looking into options, I came across the Brick It system, and it's actually super DIY friendly. Rather than utilizing full bricks, you can purchase thin brick veneers (cut from real bricks) and adhere them to wall-mounted panels.
Wall Prep
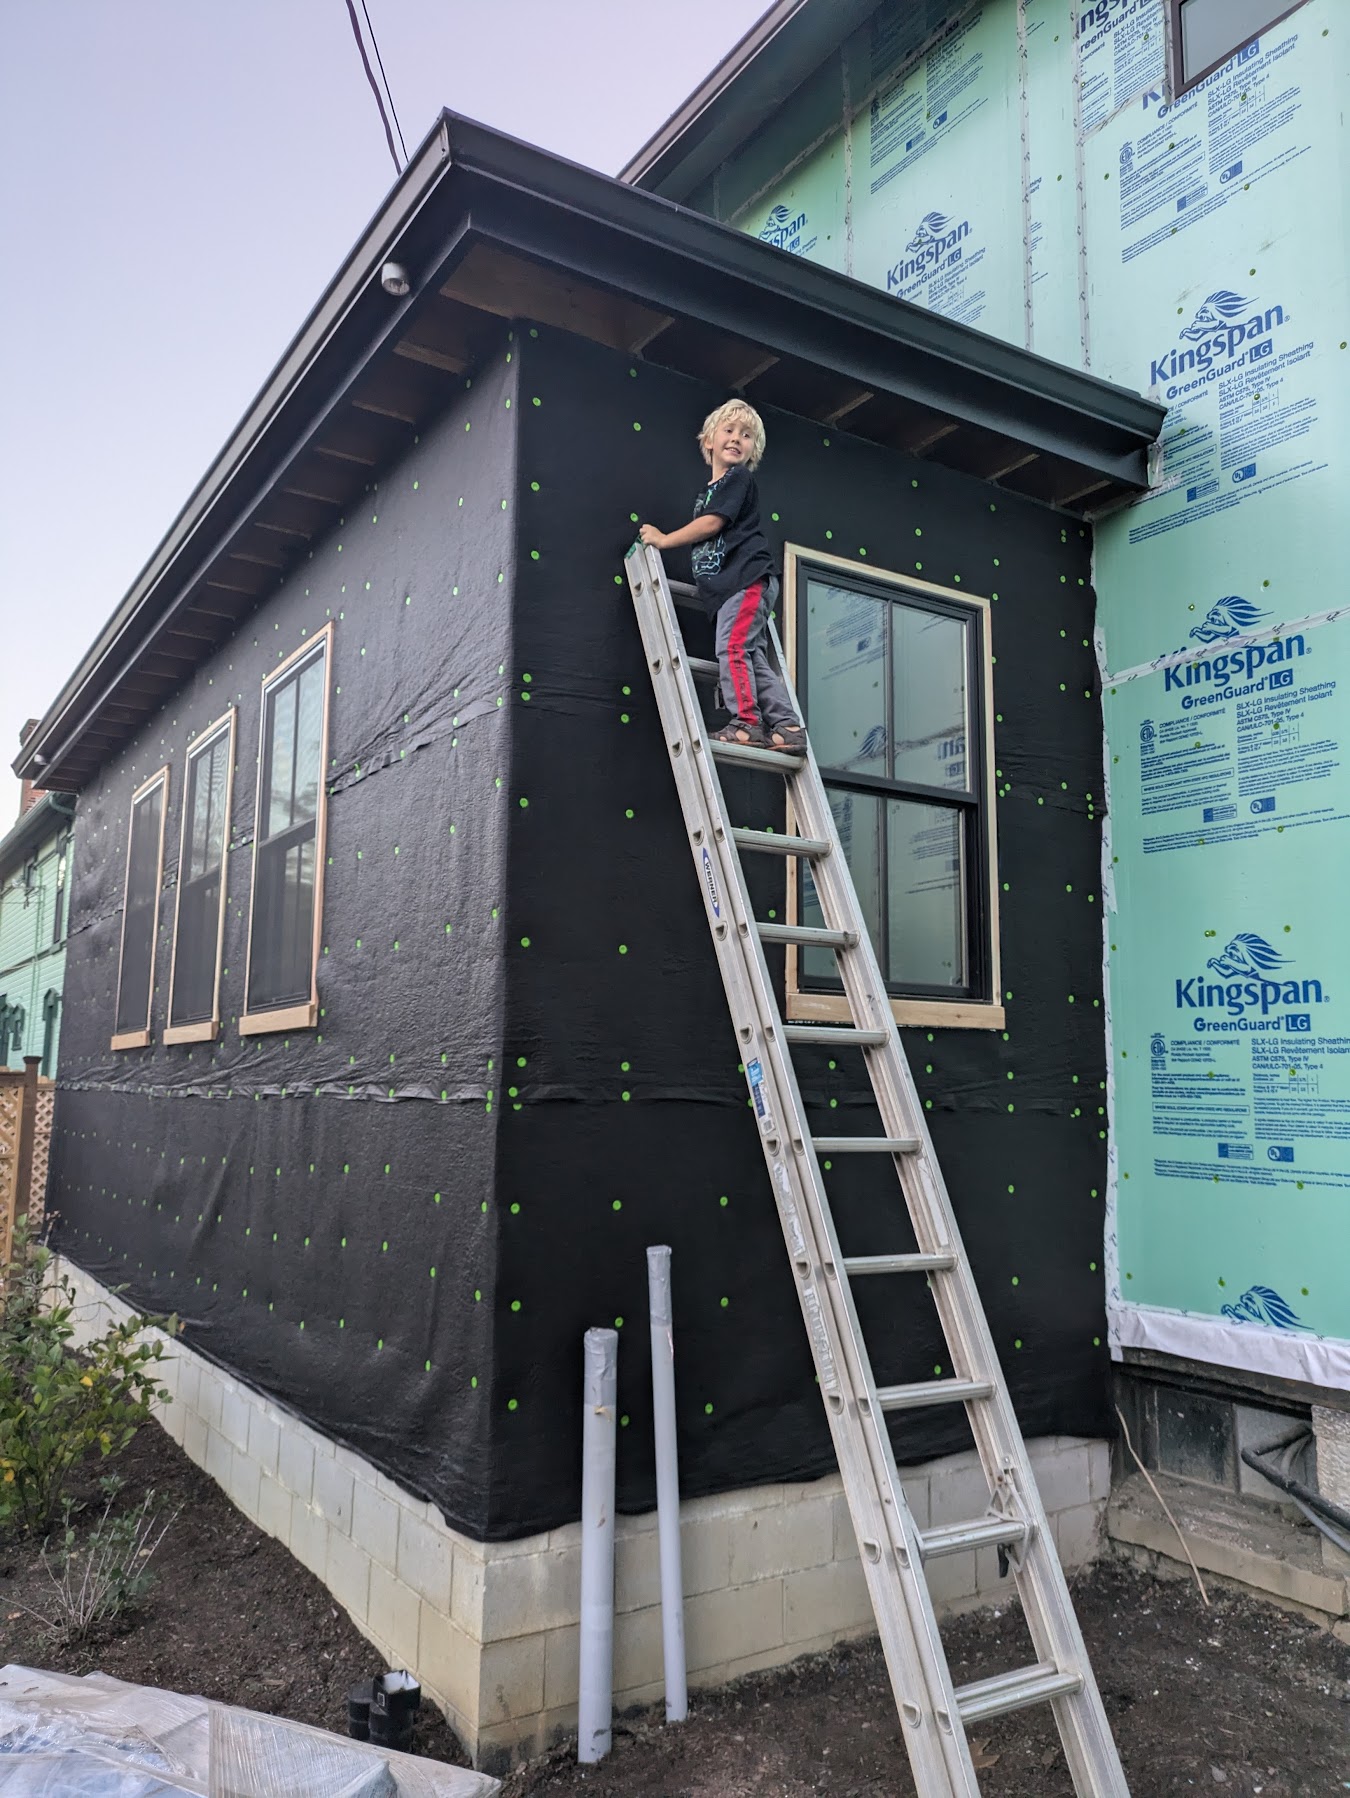
International building code requires two layers of water-proofing behind masonry exteriors. Our framing was done with the ZIP System which counts as one layer. I decided to hang a combination rainscreen and air-gap product as the second layer. This provides some air space between the layers to provide trapped moisture a path to escape. Those green dots are Stinger cap staples to hold it in place. If I were to redo this step, I'd go with a rigid XPS with drainage channels instead.
The Brick It System
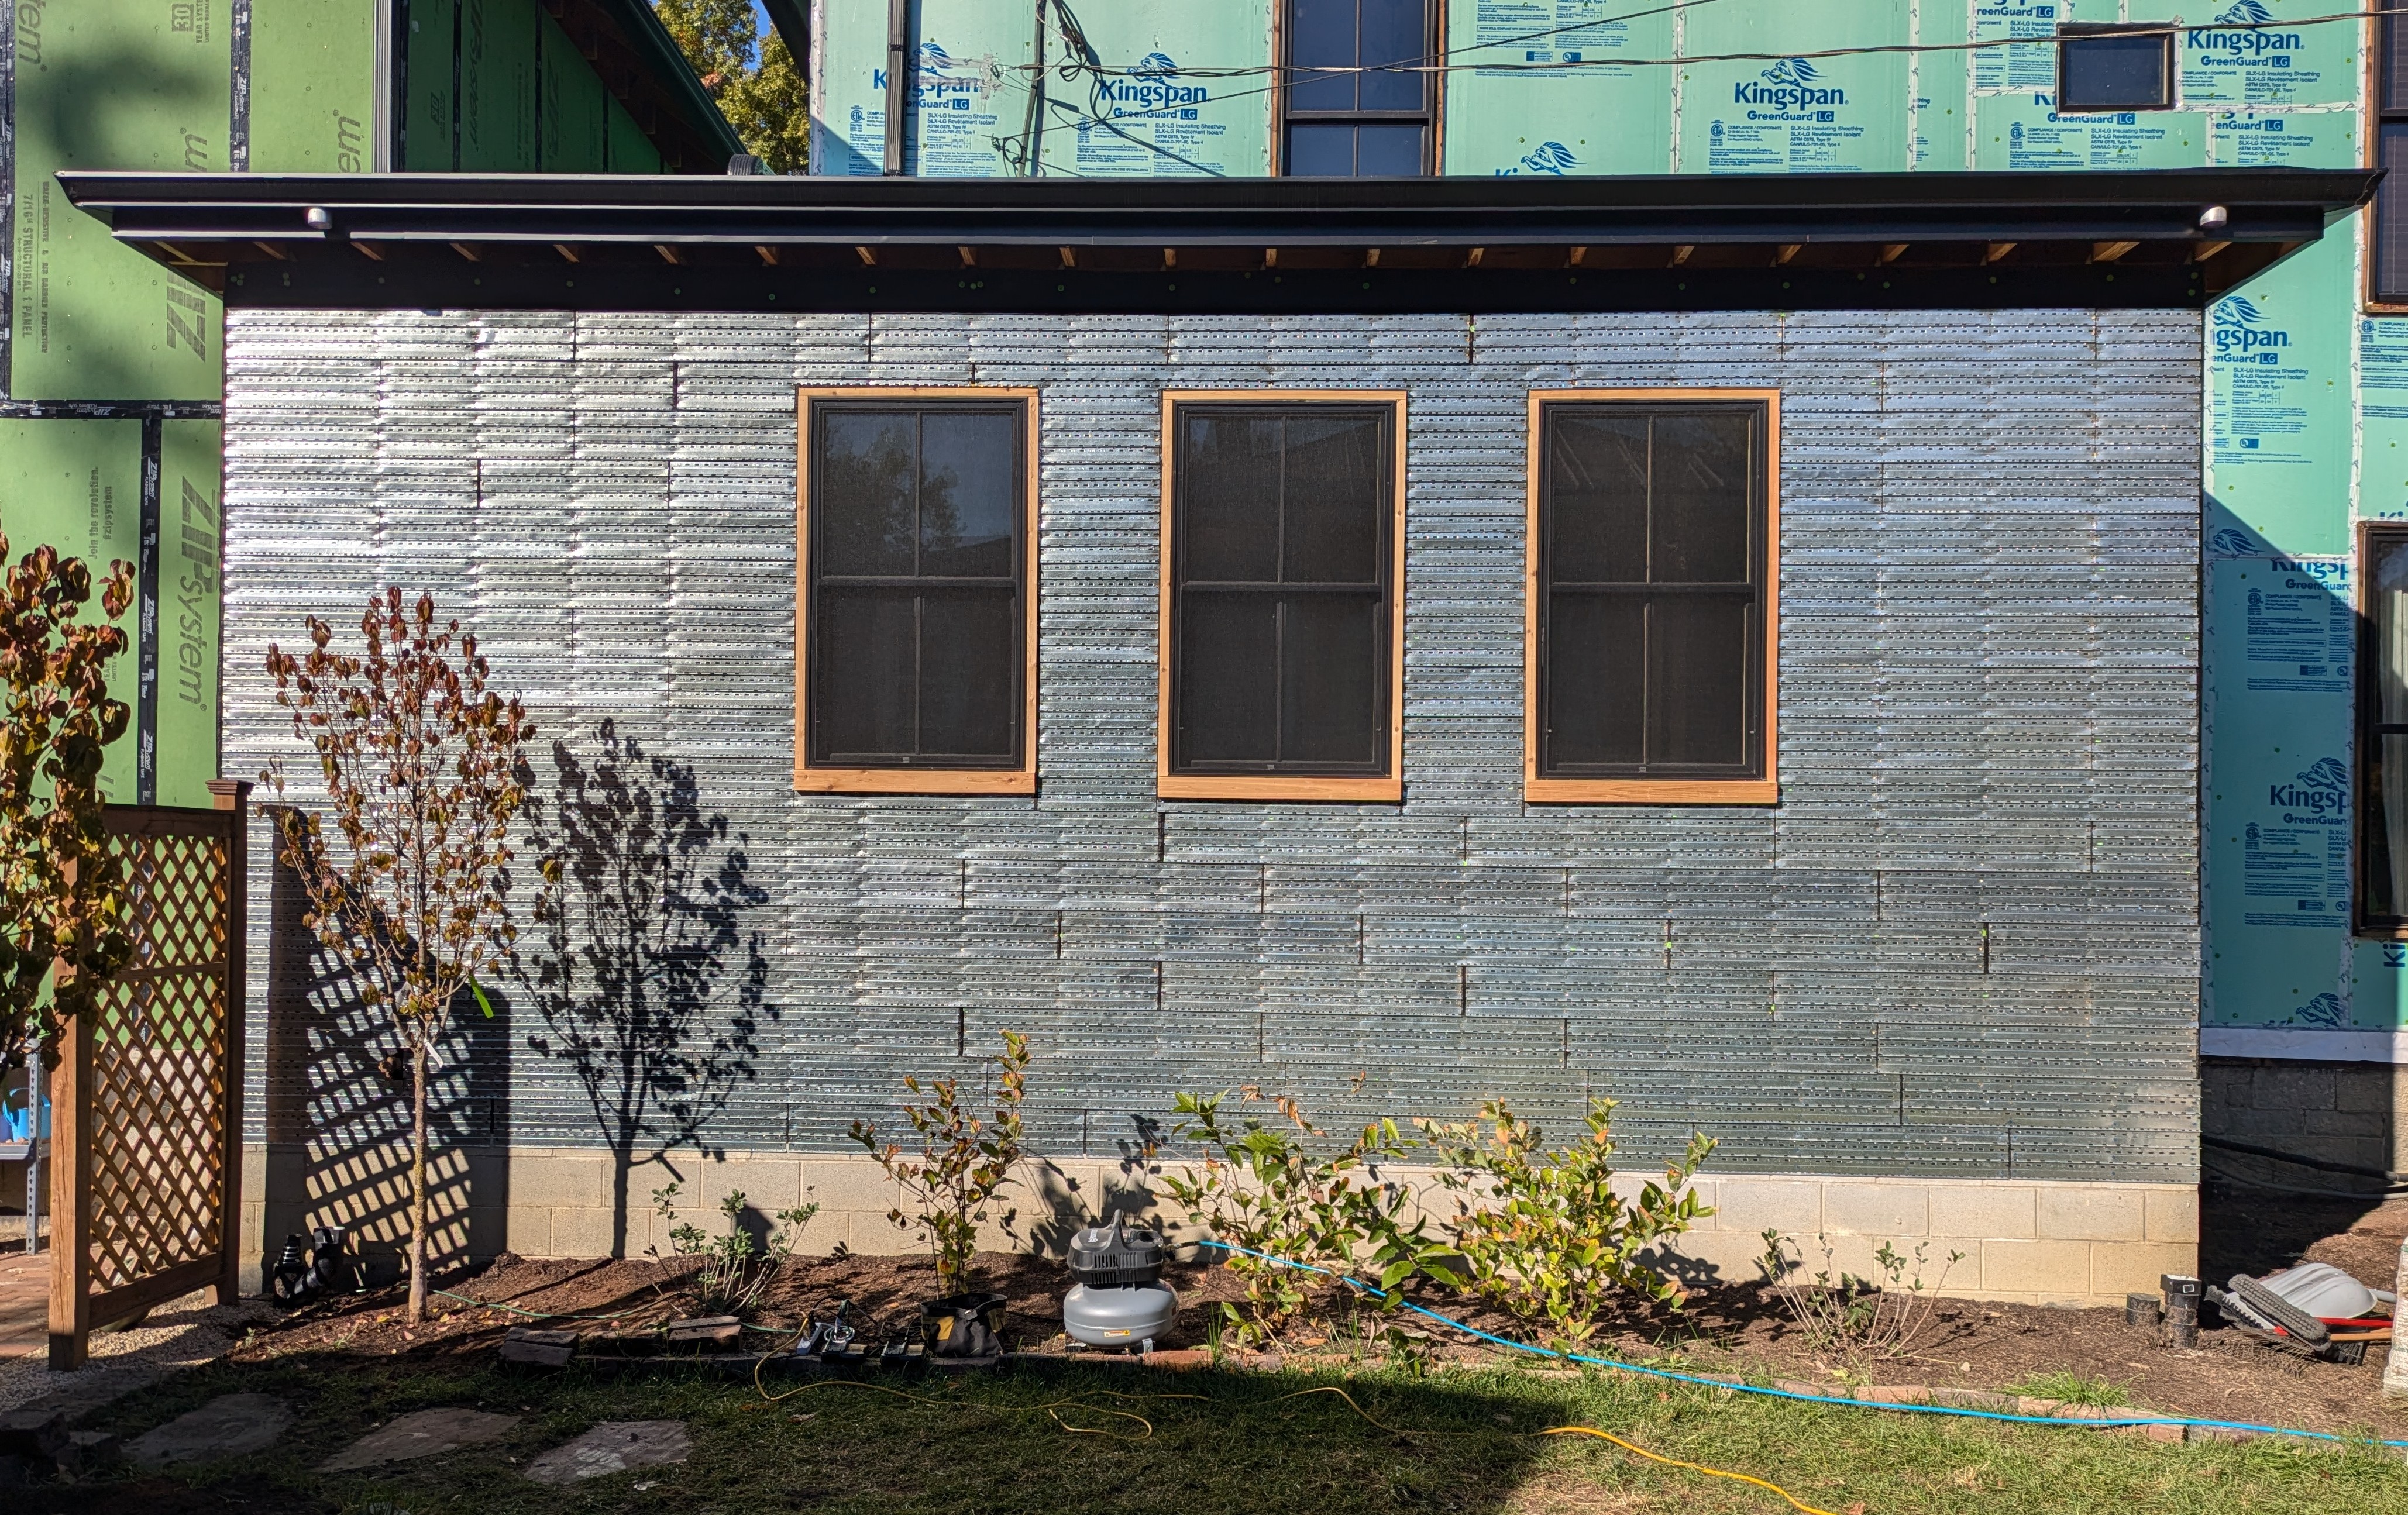
The system goes up as individual metal panels. I attached them with 2" screws and made sure they were hitting studs rather than just the sheathing. Our addition is framed using 2x6's, but we opted to space them at 16" rather than 24" which saved us here. The panels are designed to have built-in drainage and layout slots. Each panel stacks on top of the one below, so you only need to slightly adjust leveling every few rows.
Attaching the Bricks
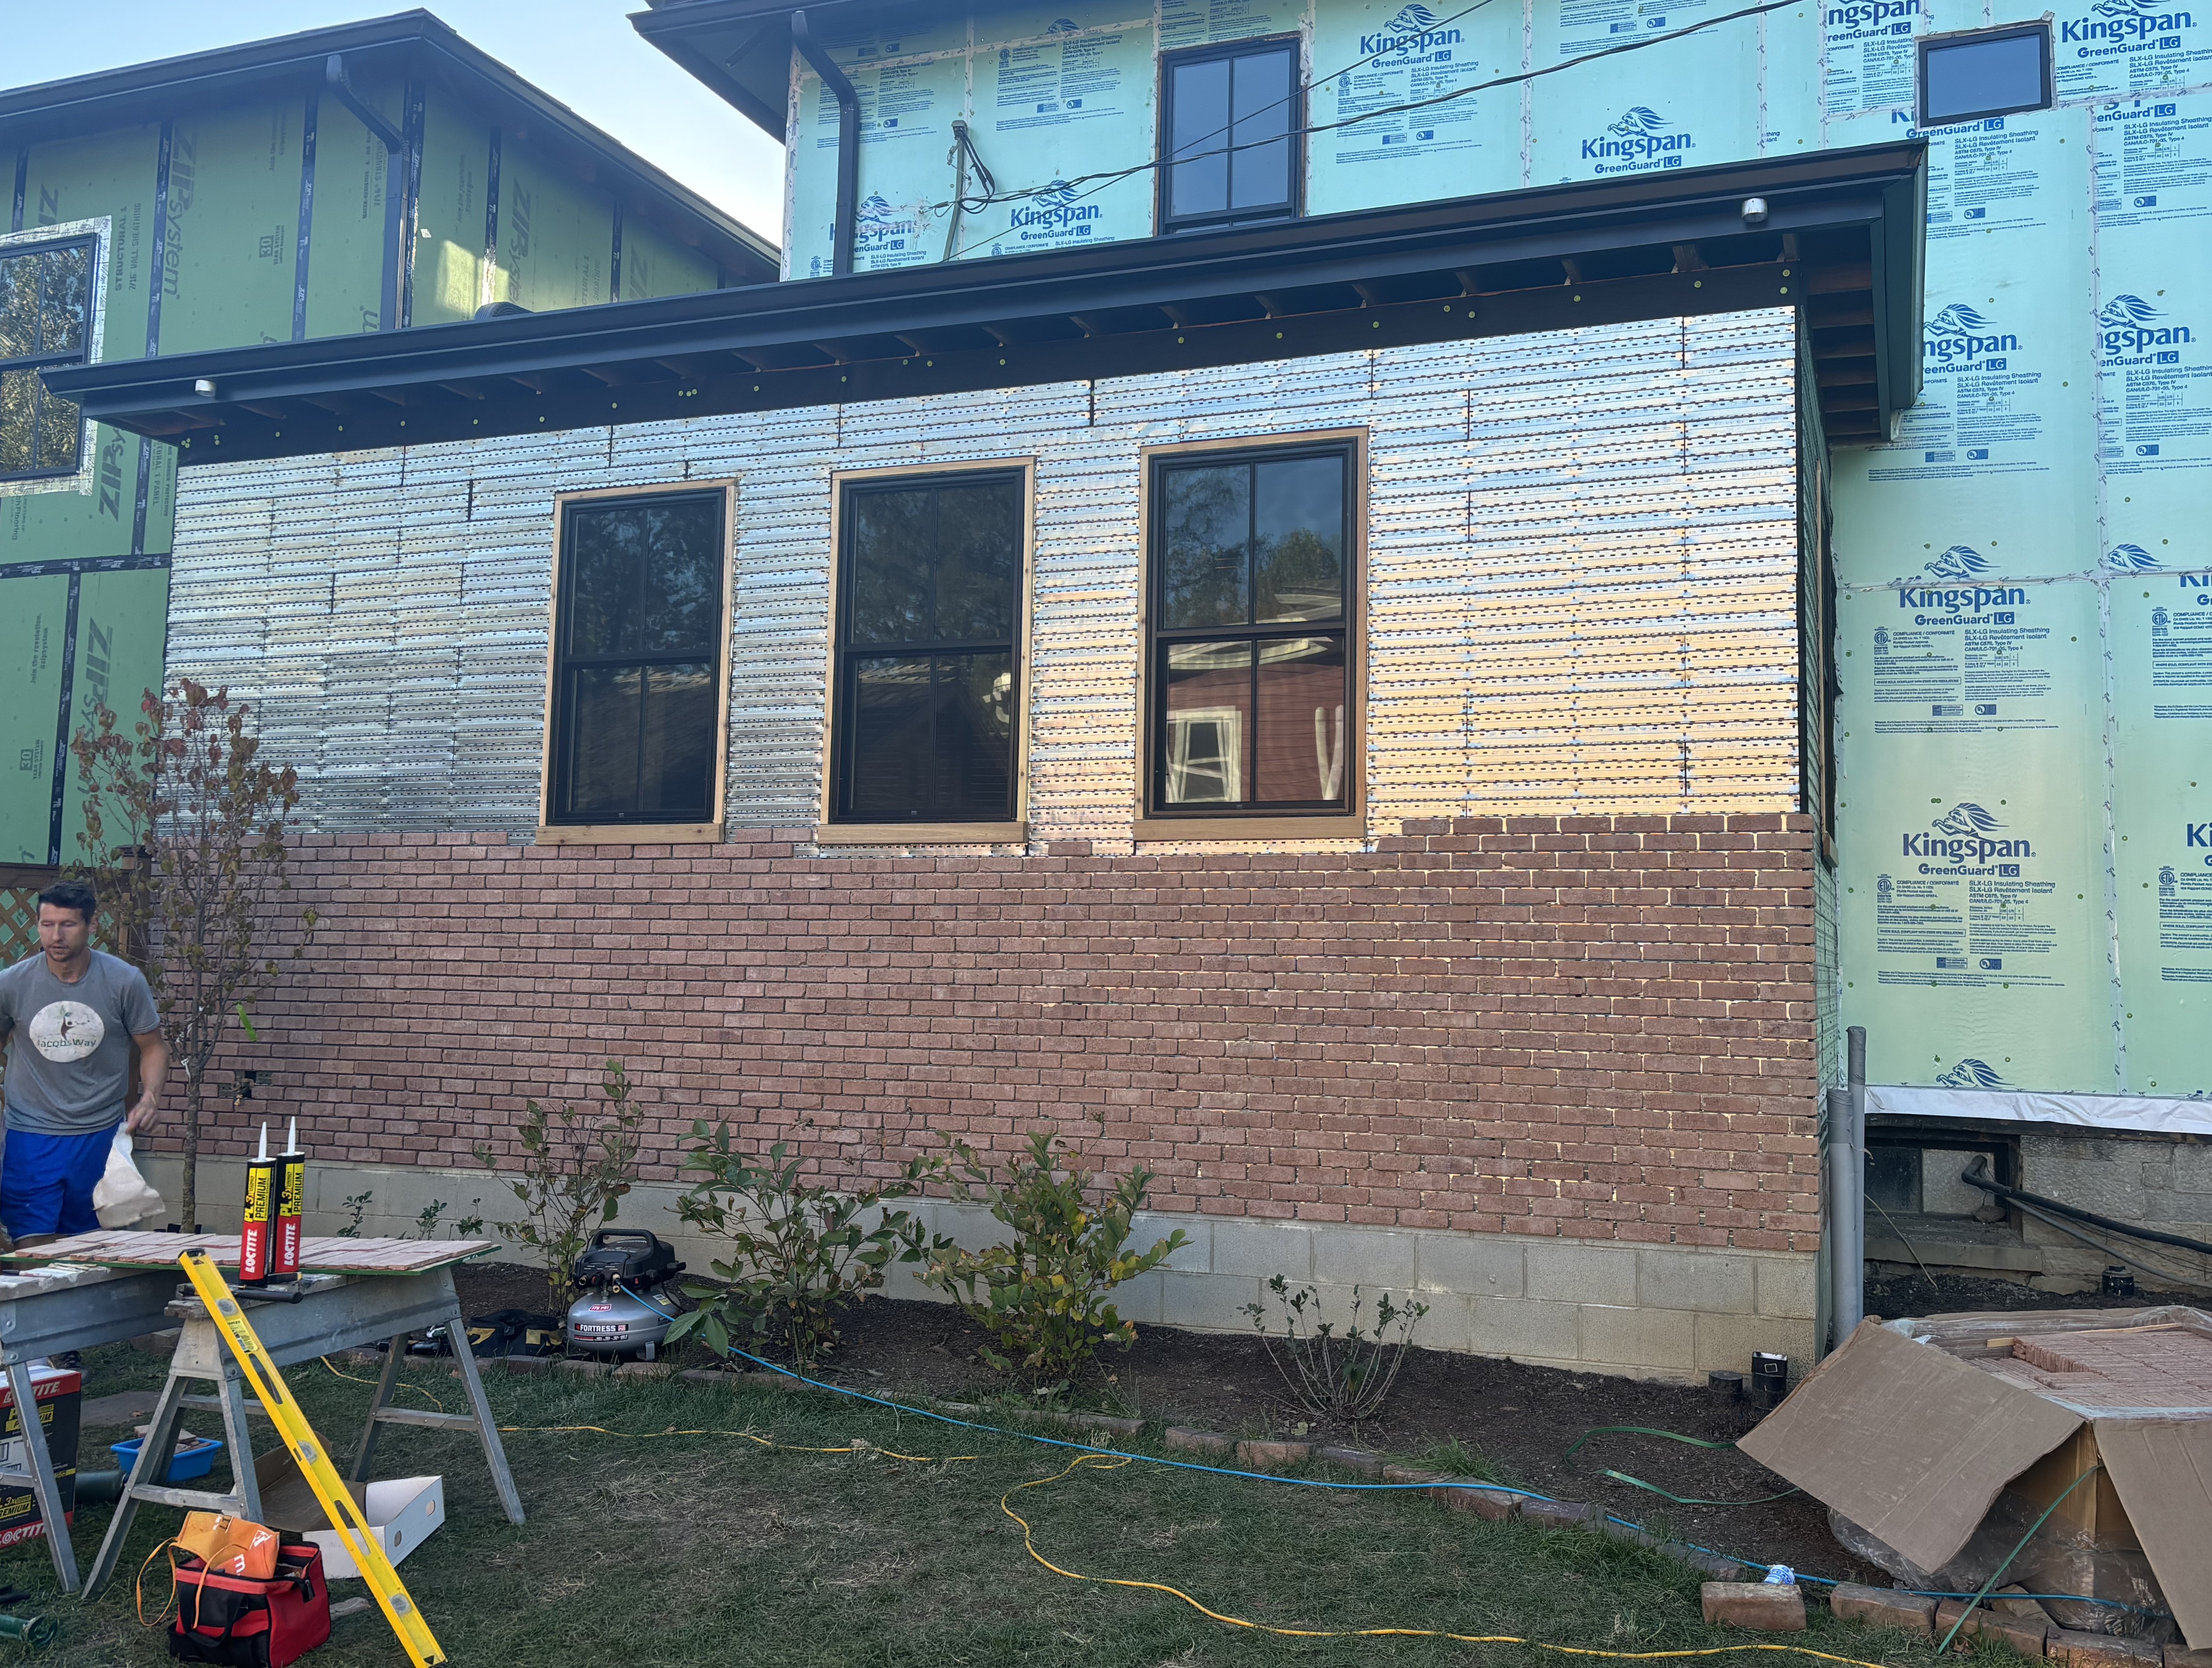
The bricks are attached to the metal panels using construction adhesive. This was definitely the most rewarding step. We left an 8" gap above and below the system so we could add a vertical course as well. This was done purely for visual interest. Since the system only supports horizontal layouts, I had to use a more traditional metal lath and scratch coat. We ordered special corner bricks which wrap around the outside corners. This gives the appearance of a full brick installation.
Mortaring
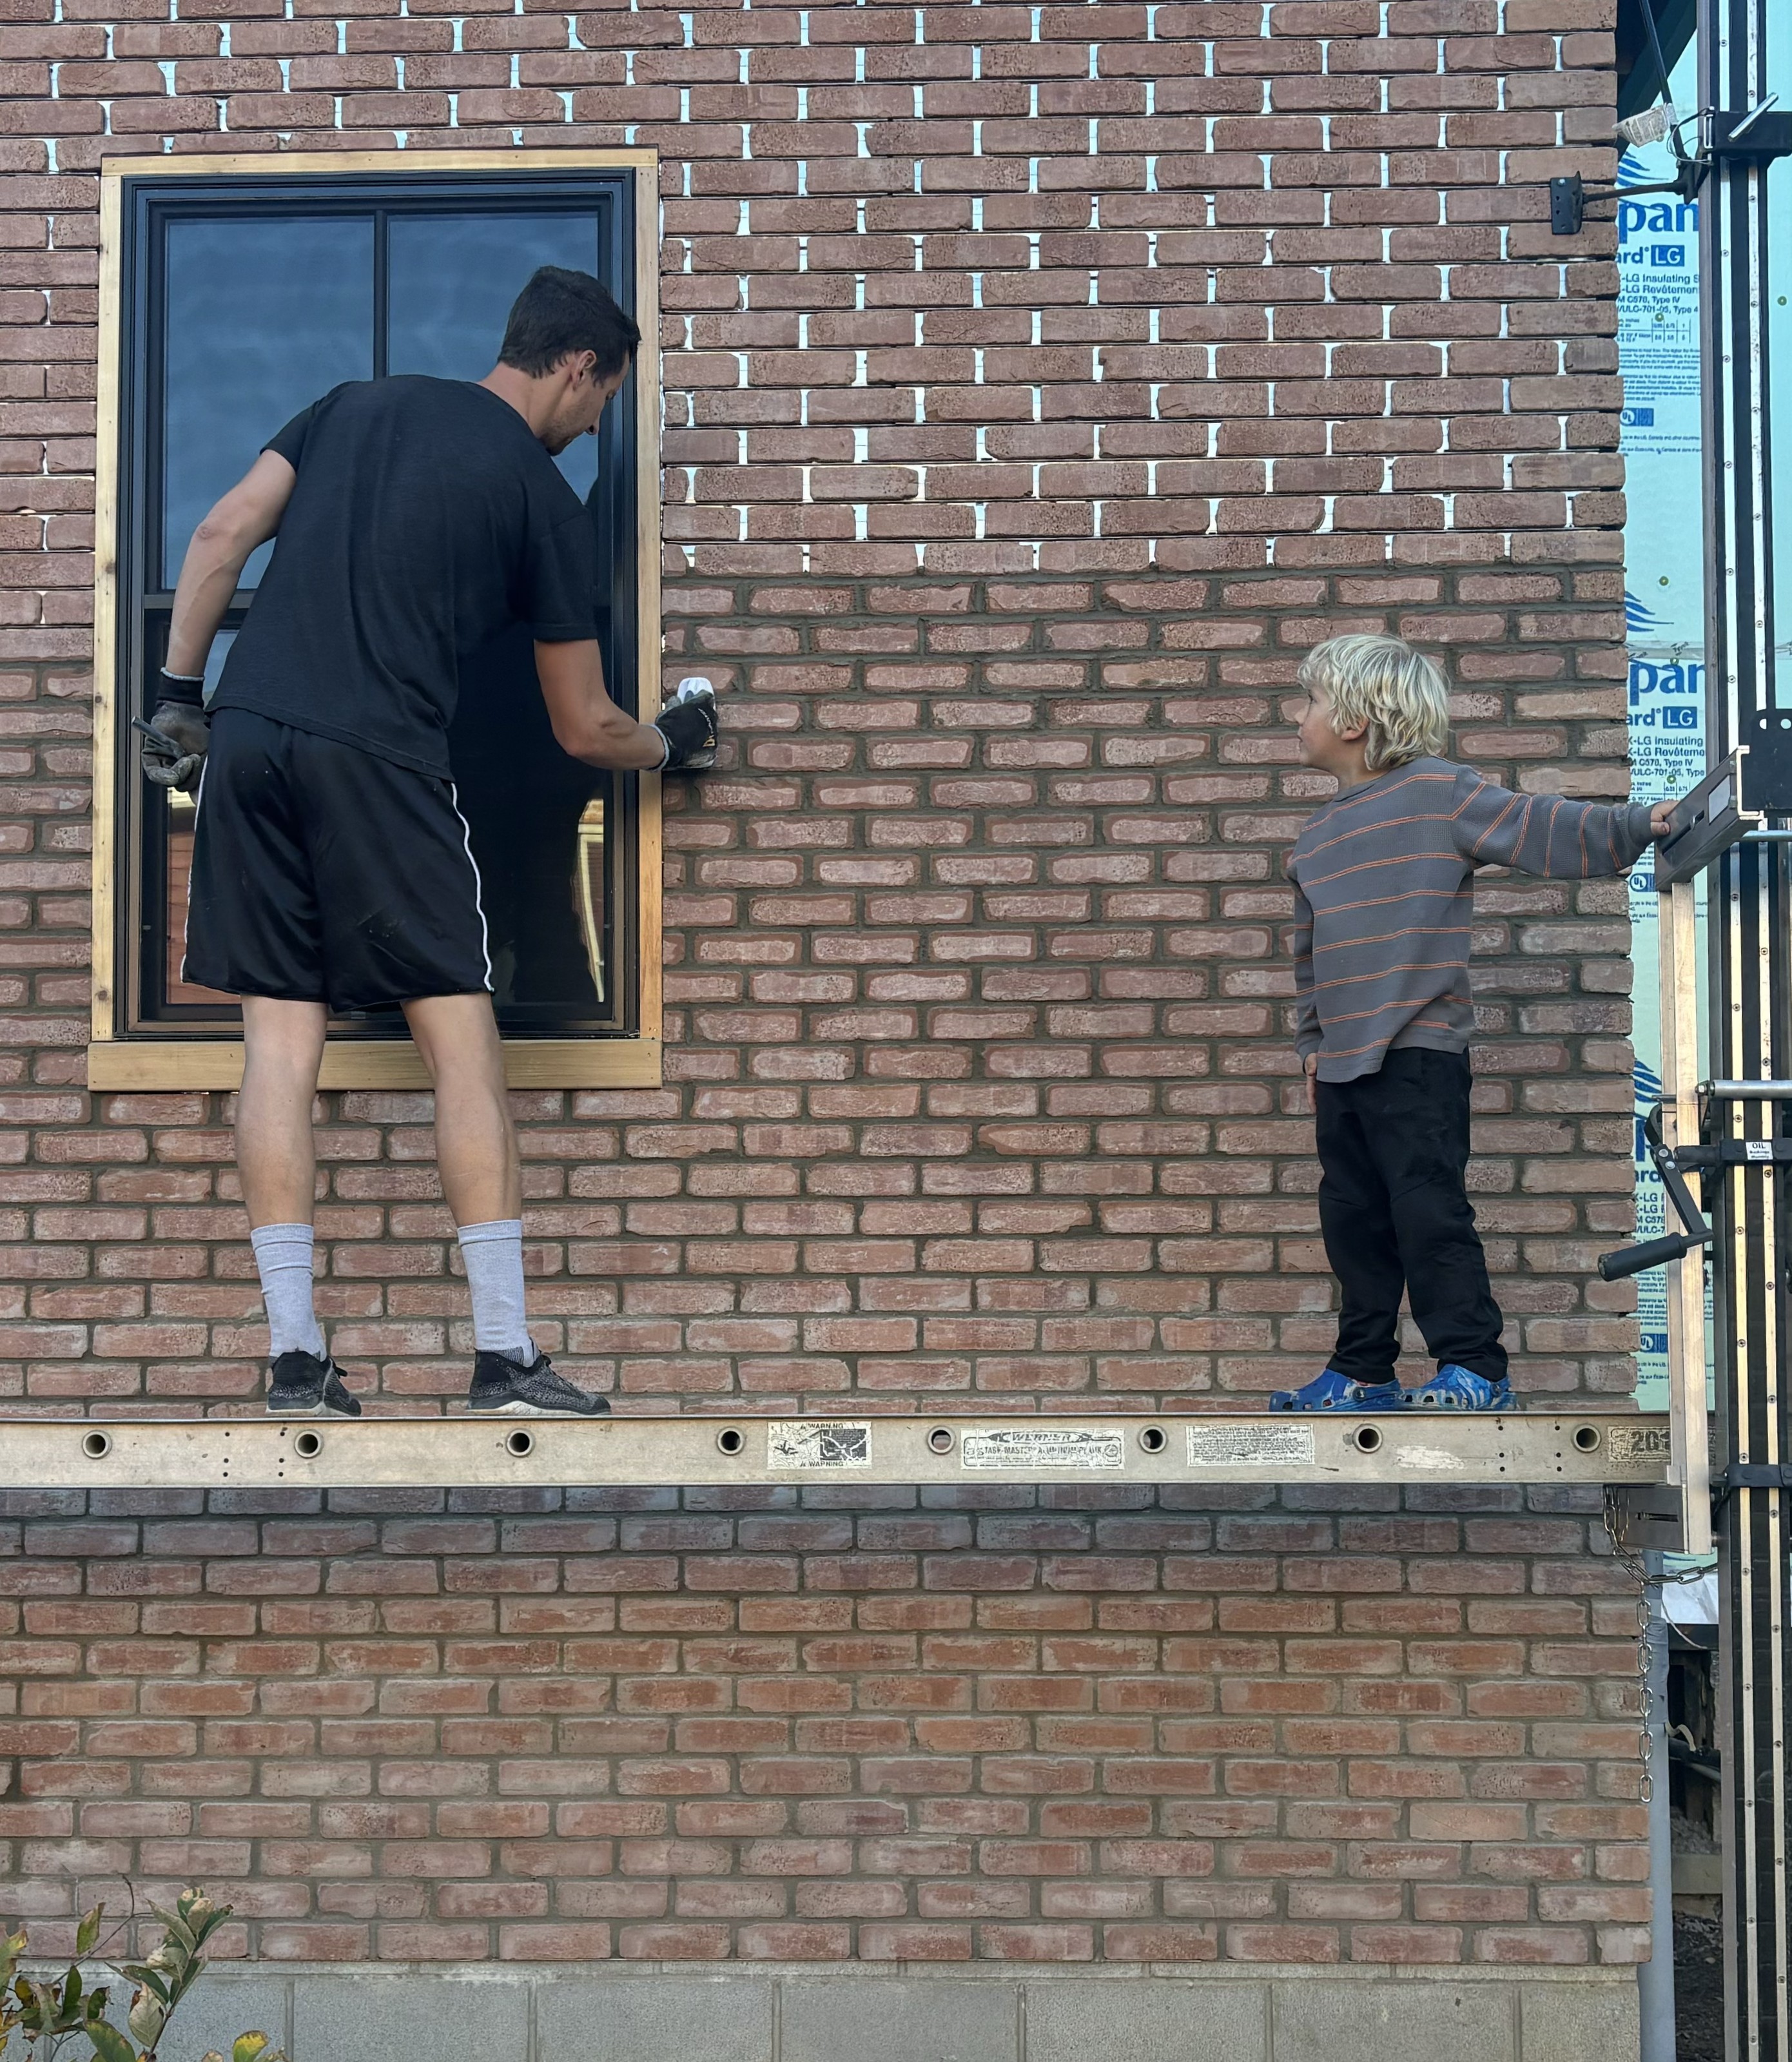
Here's the worst part. Once the bricks are adhered, you need to go back and fill each gap with mortar. Regular Type N is fine. I tried to pipe it in with a grout bag, but the sand in my premix was too coarse. Instead, I used a hawk to hold the mortar and a pointer to pack the joints. A putty knife was also really helpful on the vertical gaps. Once it's started to dry a bit, you can smooth with a jointer and brush off the brick faces. We weren't too worried about keeping everything pristine. Our bricks were chosen for their variation and would be painted anyhow.
Primed and Painted
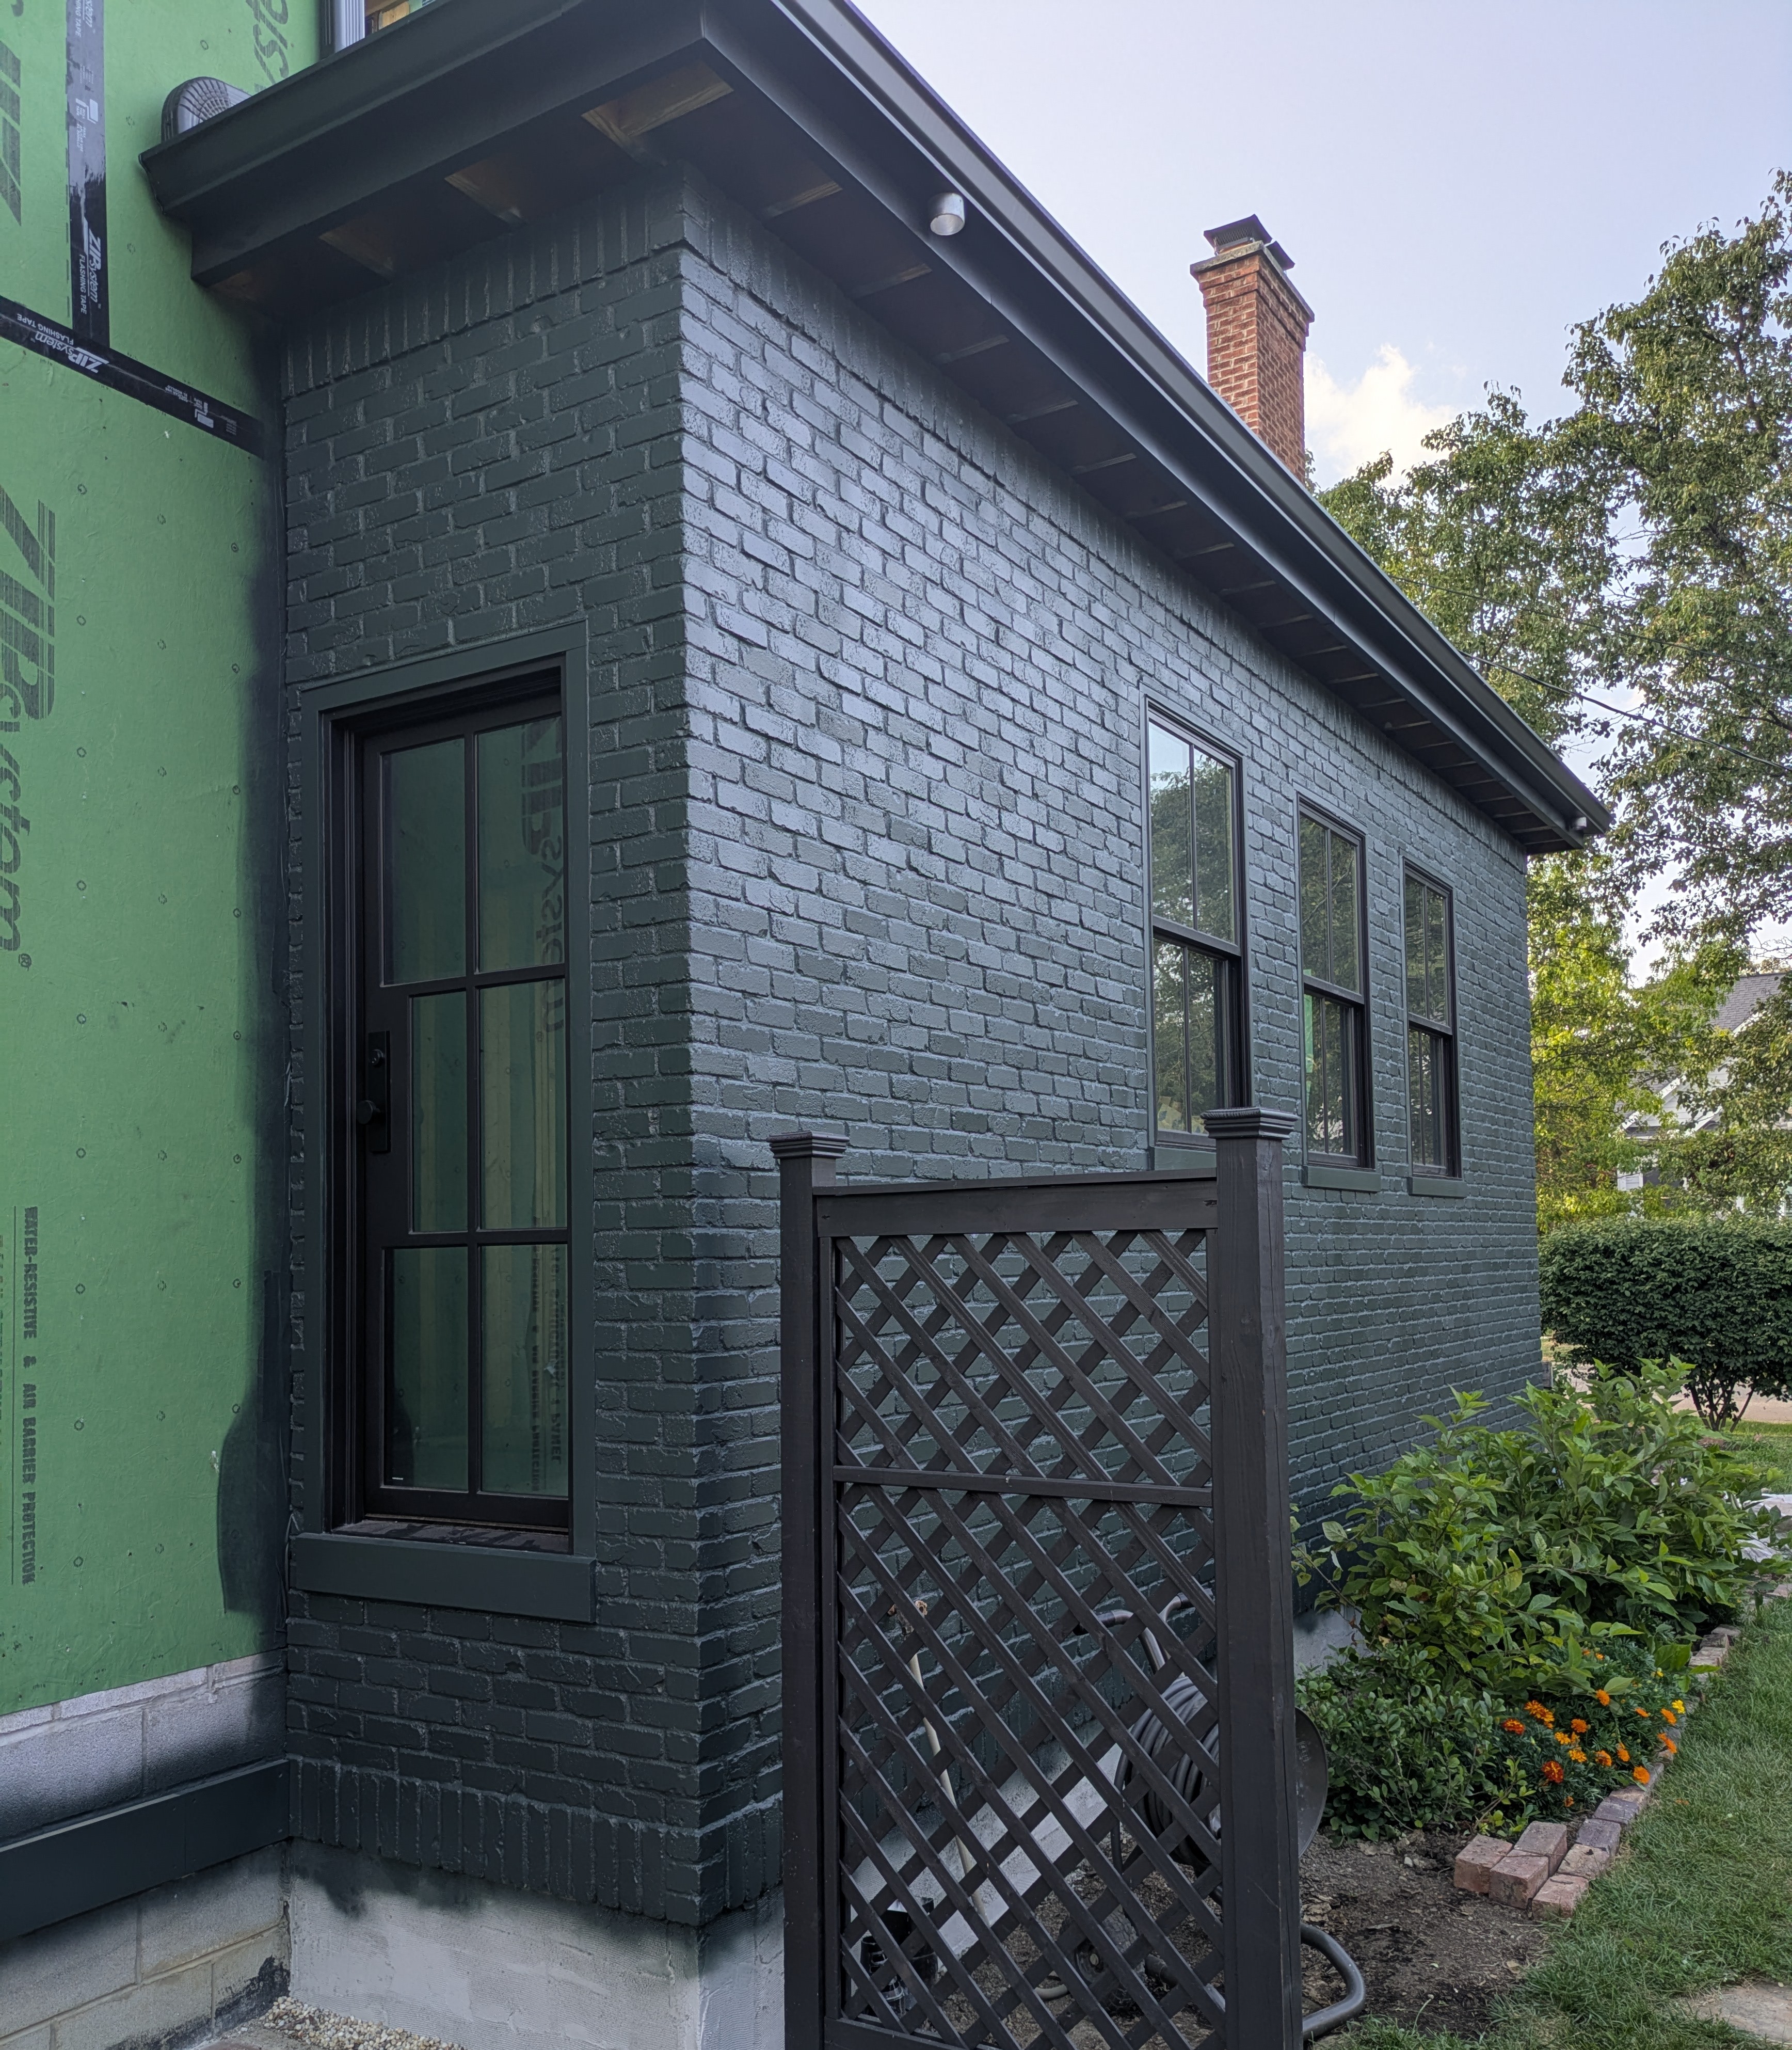
After caulking, we primed the entire wall with brushes and rollers. You need a long nap (1") when dealing with a wall this rough, and a giant nap after you've completed the work. We chose LOXON from Sherwin Williams for the primer. My wife, gratefully, did the majority of this step. Once primed, I covered the windows and doors with a masking film. Using an airless paint sprayer, I applied 3 coats of Sherwin Williams Emerald Rain Refresh. A skilled painter could've easily covered it in 2. You can see the top and bottom vertical courses in this photo, as well as the corner layout.
Conclusion
Would I recommend this system? Absolutely! This was far from a weekend project, but it's also pretty simple if you flash everything properly. Once mortared, we left it unpainted for ~8 months to make sure everything was solid through the winter freeze-thaw cycles. The final cost was somewhere around $13/sqft before primer and paint. Hiring someone to side our house is likely to push closer to $20/sqft once we factor in the extra trim details. If you have the time, it's worth the effort.